In my last post I mentioned I have three Unit Models O9 (On18) kits to build.
These are nice kits. Well designed, crisp mouldings and easy to construct.
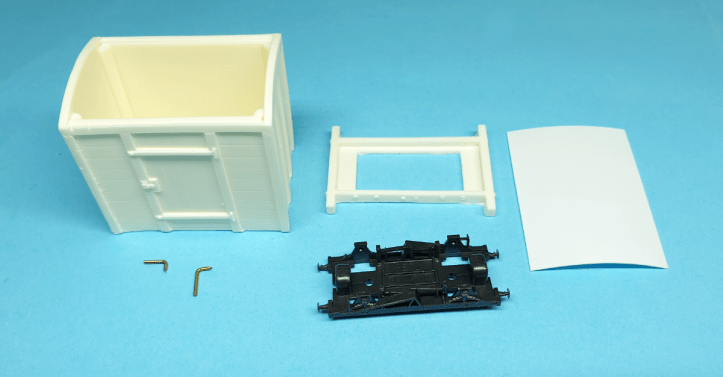
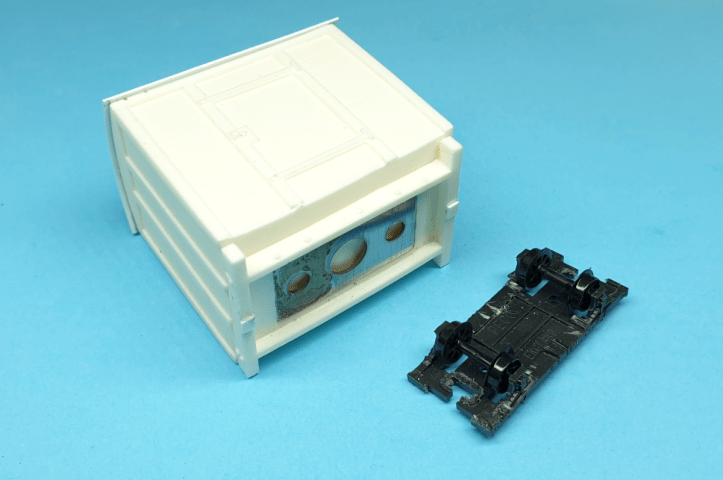
Let’s go through the process with the Covered Van kit as an example. The kit includes the resin, brass and plasticard components. You need to provide a PECO N gauge wagon chassis.
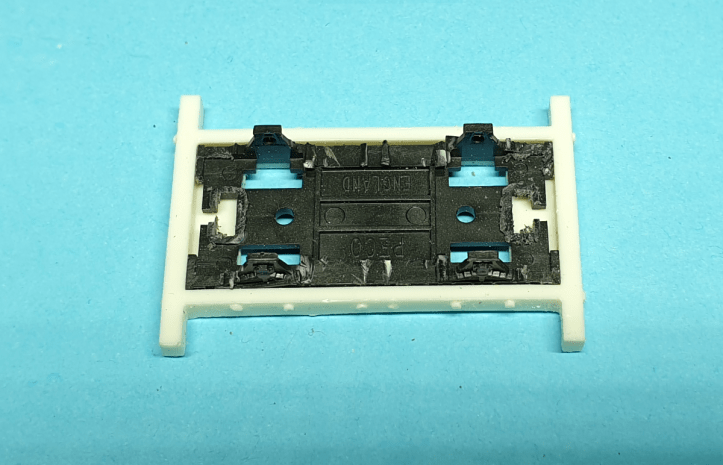
This slots into the resin chassis frame – if you cut the buffers off 🙂

I trim off the brake gear and the coupling pockets too. This helps to give the impression of a very simple narrow gauge wagon chassis.

The PECO chassis fits in place nicely.
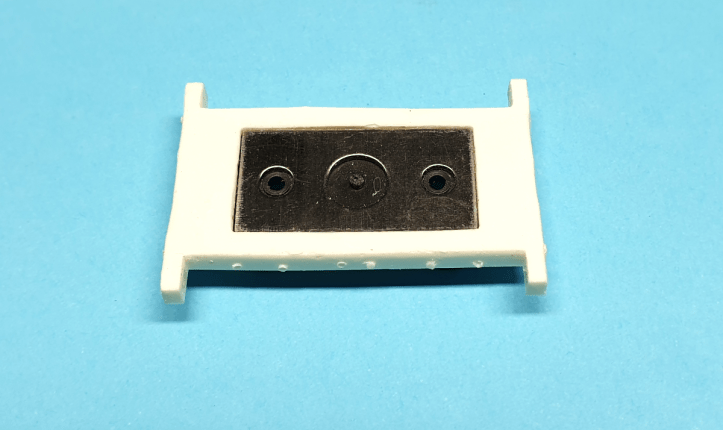
If you want to add the metal weight that’s supplied with the N Gauge chassis it’s a good idea to test that it fits now before you start assembling the kit.
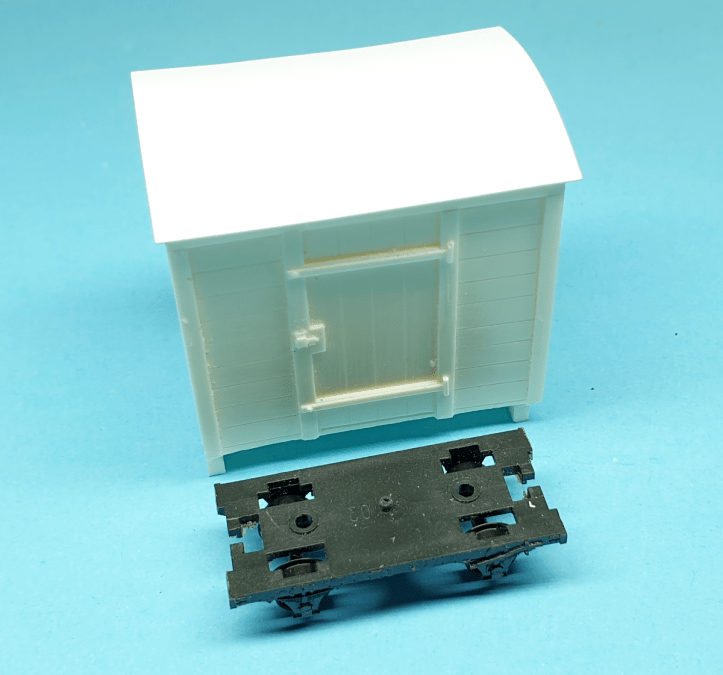
Next I assembled the body of the covered van. It’s simple to glue the resin chassis frame and plasticard roof to the van body. I used slow setting super glue.
The weight and chassis slot in place.
This is what you get after a coat of primer.

I told you the kits were easy to assemble 🙂
There’s nothing wrong with the axle boxes, but to make the wagon look even more like an industrial narrow gauge wagon I created some fake axle boxes in TinkerCad.
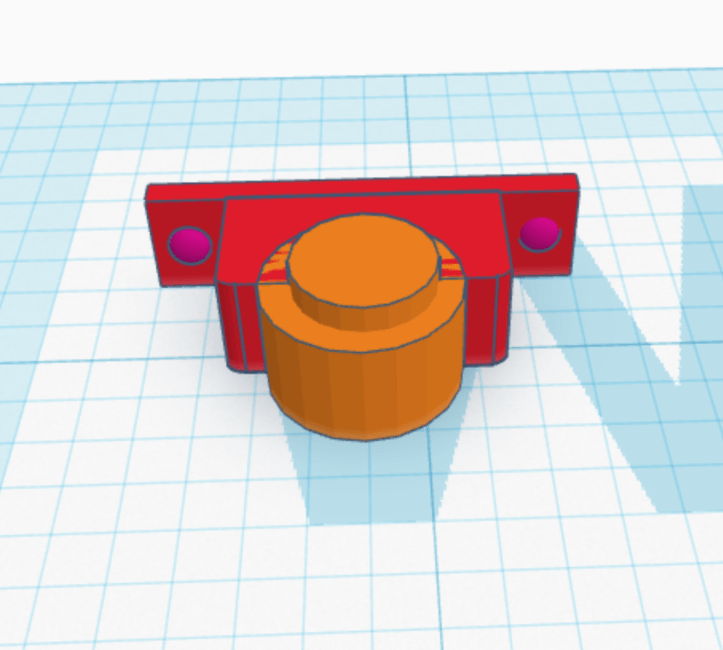
These were printed in PLA. The finish isn’t that smooth but I will paint them so they appear heavily rusted and the roughness will add some texture!

Here’s a picture of the trio of wagons.

Next time, I’ll add the fake axle boxes before I apply the primer. (To be honest the axle boxes were a bit of an after thought !)

So far so good. These will need another coat of primer then they can go to the paint shop.
I’m looking forward to that – I really enjoy painting wagons.

Thanks for taking the time to record your builds. It is very interesting to follow. Really like these unit wagons.
Henrik
LikeLike
Thanks Henrik. Yes, I like these Unit Model kits too. They can be build as they are or they are very suitable for extra detailing. I build one of their box van before and I added lots of rivel heads to the metal work https://009adventure.blog/2017/07/13/vantastic/ . No axle box covers though 🙂
All the best
Steve
LikeLike
Dear Steve
Enjoyed your exploded view of kit builds as B4, I have got all this firms kits I have got their loco’s as well the diesel looks smart when finished, I got the battery loco but not got round to finishing it. You have the knack of making every thing look simple, appreciate your methods It encourages me. Been planning a simple layout B4 I die or nothing gets done, did you see O9 Locos on e bay I sent you email Great to see this new venture and your approach what did you wash kits in B4 painting as paint will not always stick if oil not got off the models first. Keep up the good work.
All the Best Roger Sisley
LikeLike
Hi Roger
Good to hear from you. I’m pleased you find the blog useful. I’m glad you recommend the Unit Models diesel kit. I have brought one but haven’t made it yet…
Yes I saw your email about the O9 locos (thought I’d replied, but maybe I hadn’t). I’ve asked Santa for one of the Simplex locos – they look very nice indeed! Also I’ve asked Santa for one of the books you recommended too. I hope Santa thinks I’ve been a good boy this year 🙂
After I’ve made a model, I use an old toothbrush and tooth paste to give the model a good scrub. I’m told the tooth paste is slightly abrasive and it helps to ‘key’ the surface as well as de greasing it. Then I give the model a good rinse in body temperature water (not too hot or too cold) and leave it to dry for a few days. This seems to work well. I do it for white metal figures, resin kits, brass kits and injection molded models too. Give it a try – but don’t use your partner’s toothbrush 😉
All the best
Steve
LikeLike