
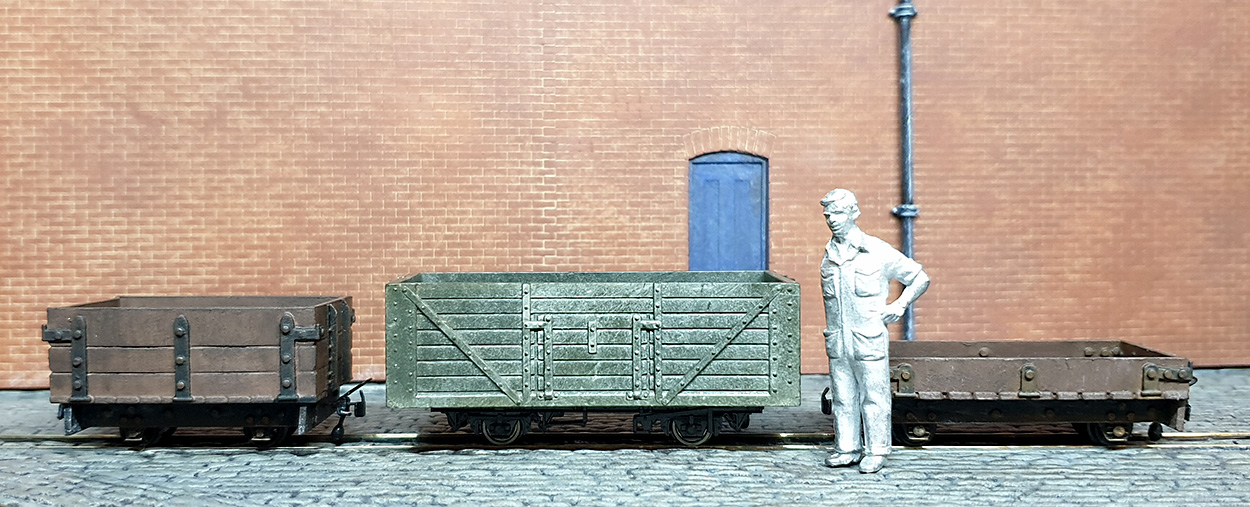
When I went to the Daventry exhibition earlier this year I was impressed by Bob Hughes’s conversion of OO (1:76) scale wagons to 5.5mm (1:55) scale 3 foot (metre) gauge stock. Bob used two OO wagons, cut them down to two-thirds of their original width and then the two two-thirds sections were combined to create a wagon that is slightly wider than the original. (By the way if you haven’t seen it already Bob’s blog, Playing Trains, is well worth reading).
I found this old OO scale Tri-ang R 10/13 wagon in a ‘rummage box’ at an exhibition and brought it for £1 – a great price. I thought I’d have a go at converting it into an O9 wagon.

My O9 loading gauge is 28mm (1.10 inch) and the Tri-ang wagon is 31.5mm (1.24 inch) wide. To reduce the width of the wagon I cut along the length of the wagon, twice, with a razor saw. Bob had advised me to cut next to the end stanchions because it helps to disguise the fact that the wagon has been modified. I did this for the first cut, but for the second one I had no choice by to cut across the planking.

To see if it was worth proceeding with the conversion, I held the wagon body together with Blu-Tack and placed it on a long wheel base Peco N gauge chassis (Peco NR12, for the chassis spotters out there). To be honest it looks better than I’d expected. The wheelbase of the chassis needs to be longer and the ‘ride height’ is a little higher than I’d like, but it fits in with my other O9 stock quite well.
The chassis was cut in half, and all the brake mechanisms and brake shoes were removed. I removed some plastic circles on the upper surface of the chassis that are designed to hold a metal weight in place. I filed off the raised mouldings on the underside of the wagon. This reduced the ride height by about 1mm (40 thou).

The two parts of the wagon body were glued together and the chassis was glued to underside of wagon. Five minute Araldite is great for this type of job.
Normally my O9 stock has fixed couplings, but this is a long wagon and I thought couplings with some side to side movement might be more suitable for the tight curves of Thomas and Sons. I’ve never fitted ‘swinging’ couplings before. I improvised a pivot using pins from our sewing box. The pins are 0.53mm (21 thou) in diameter and fit through the existing holes in the Greenwich couplings quite well. However, they’re 26mm (roughly 1 inch) long and they need to be cut to a reasonable length!

Buffer beams and fake sole bars for the chassis were made from 1mm thick (40 thou) plasticard. I used short lengths of 1.6mm (62 thou) and 1mm (40 thou) diameter rod to add some detailing. Small slots were cut in the buffer beams to allow the couplings to move from side to side.

These components were assembled into a frame, with short pieces of L section in the corners and a bar of thicker plasticard in the middle to add some strength. I keep scraps of plastic section in a box, they’re so useful for jobs like this.
The only complication was that I mounted the buffer beams the wrong way up (Oops!). This would mean the coupling height would be wrong so I had to remove them and stick them back on in the correct orientation. It doesn’t look pretty because I used permanent marker pen to mark the positions of the pieces and the ink runs when you apply the liquid poly plastic cement. Who said the marker pen was permanent ??!

The picture at the beginning of this blog shows the converted wagon, with the fake chassis held in place with Blu-Tack. I haven’t glued everything together yet!
